February’s Challenge - HSTs by Elle Irby
For February's #DCMQG2021challenge, we are going to explore those workhorses of the quilt world - HSTs, or half-square triangles. There are lots of different ways to make them, including 1 at a time (beware those bias edges), 2 at a time by putting two squares together and sewing on either side of a diagonal line, and then there is my favorite way...many at a time! I've made a super simple pattern to allow you to try this method to see how it works. I've also got a bigger challenge for those of you who have done these before and want to make the quilt we made several years ago as a group charity quilt resized for a baby quilt, in which you get to make (96) 3" finished HSTs and (25) 9-patch blocks using those ubiquitous 2.5" squares we probably have laying around looking for a home. Watch for an addition to this post about that quilt in a few days, and if you want to get started on it before it is posted, please start making your 9 patches.
HSTs Many at a Time
As a general matter, first you need to determine how many HSTs you need, what their finished size is (the size that they will be after they are sewn into the quilt), and what size pieces of fabric you have. At that point, it is just some simple math. Take the finished size of your HST and add 1 inch if you want to have room to trim them down to perfection, or add 7/8" if you don't want to trim them and you have a pretty good scant 1/4" seam in your repertoire. Then create a grid or array that has half the number of squares as the total number of HSTs you need from that fabric combination. You may need to make several different grids to efficiently use your fabric. I prefer to use arrays that have 1 additional row compared to the number of columns (or vice versa), because then you can more easily draw diagonal lines across your grid that allows for a continuous sewing line. I also like making them 8 at a time using this grid method with an "x" across the grid, as then your HSTs are not on the bias. I have posted a pretty long set of videos and pictures on my IG feed under the "Highlights" tab called "HSTs Many/Time" to try to show this better for visual learners, but I think when I show you the pattern, it will become easier to see. I'm including space to trim up the HSTs you will be creating below, but if you don't want to trim, adjust the measurements accordingly to make 12 squares that measure 6.875" (so your array would measure 13.75" x 20 5/8").
To make the featured quilt using 6.5” HSTs
- Gather 3 fat quarters OR a half yard and a fat quarter of coordinating prints plus at least 28" by width of fabric of background fabric. Press and starch your fabrics to make the fabric easier to handle

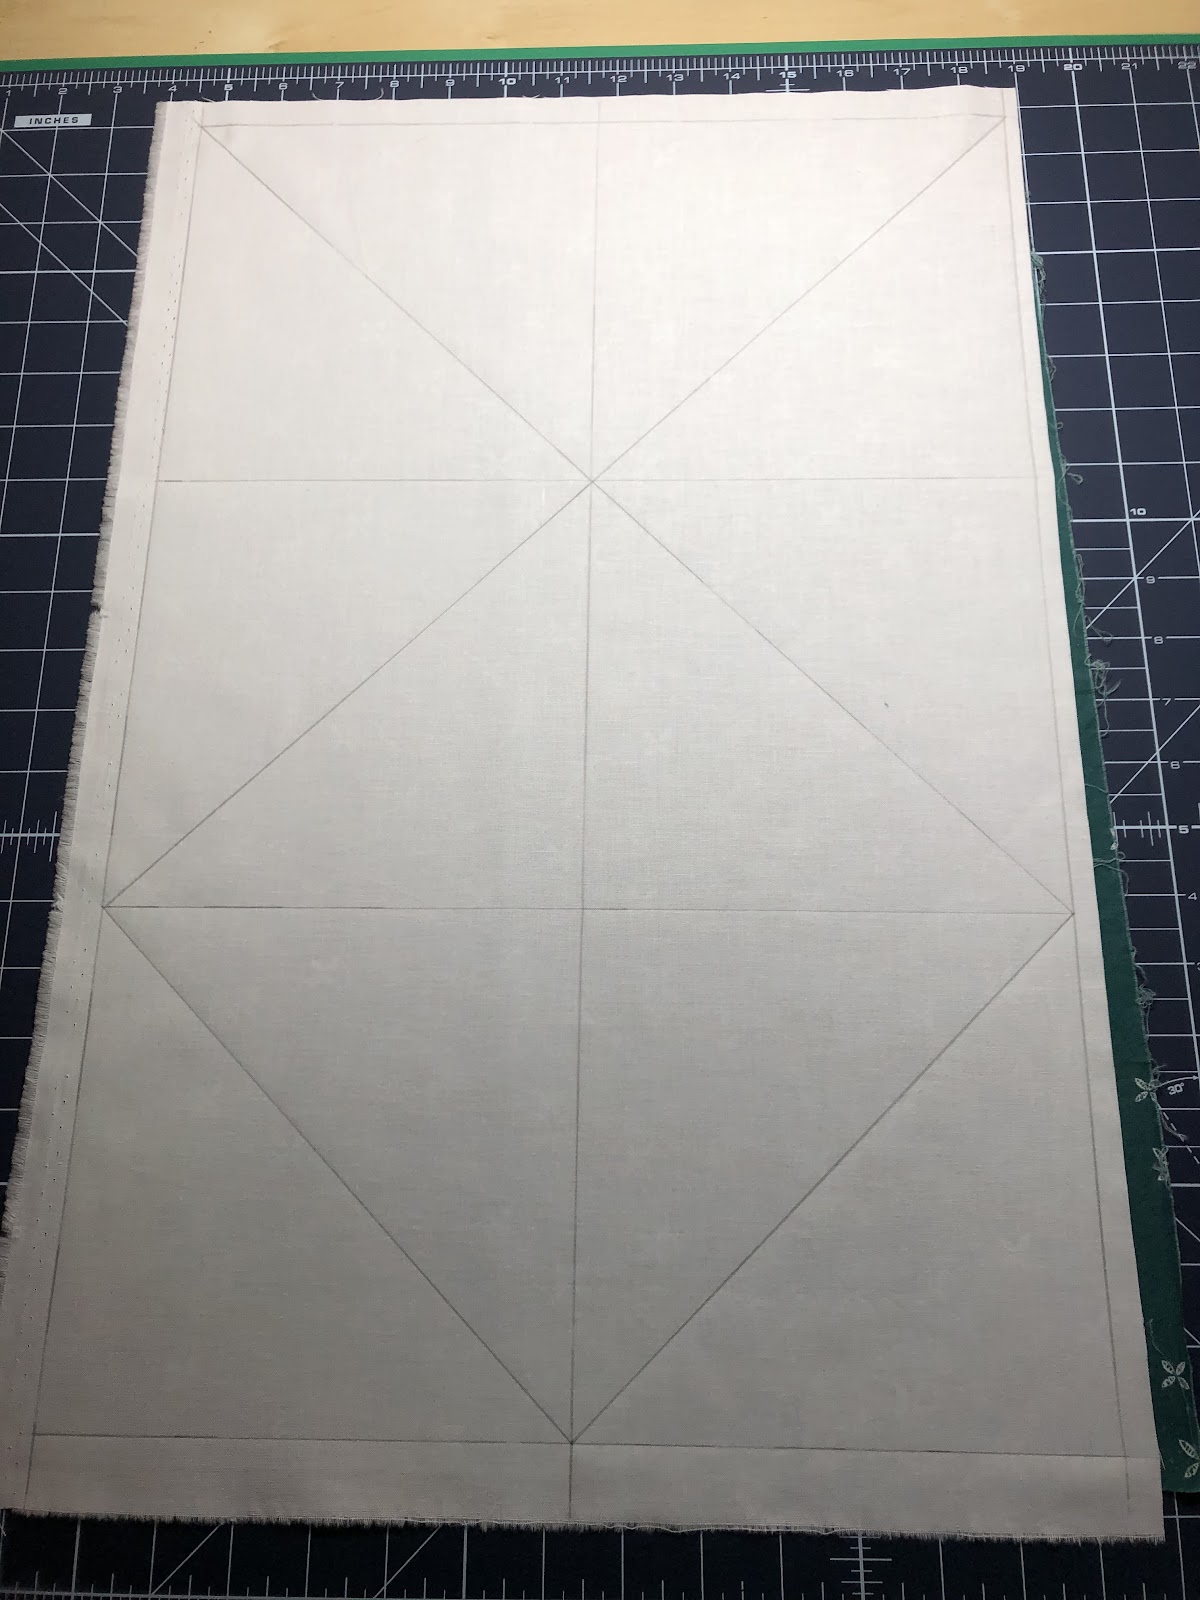
- Then draw the shape shown in the picture (basically an "x" through the top 4 blocks and a "v" through the bottom 2 blocks) so that you have a continuous line through all the squares. Pin the background to the print right sides together, and sew 1/4" from the diagonal lines that you have just drawn, turning the piece of fabric as necessary and using a slightly shorter stitch length (2.0), and as you approach the inside intersections where you will need to turn the fabric, lower your stitch length so that you can turn exactly on the grid line to maintain your 1/4" seam allowance. When you are done with your stitching, you will have 12 HSTs.