June challenge - Precision curves by Meg
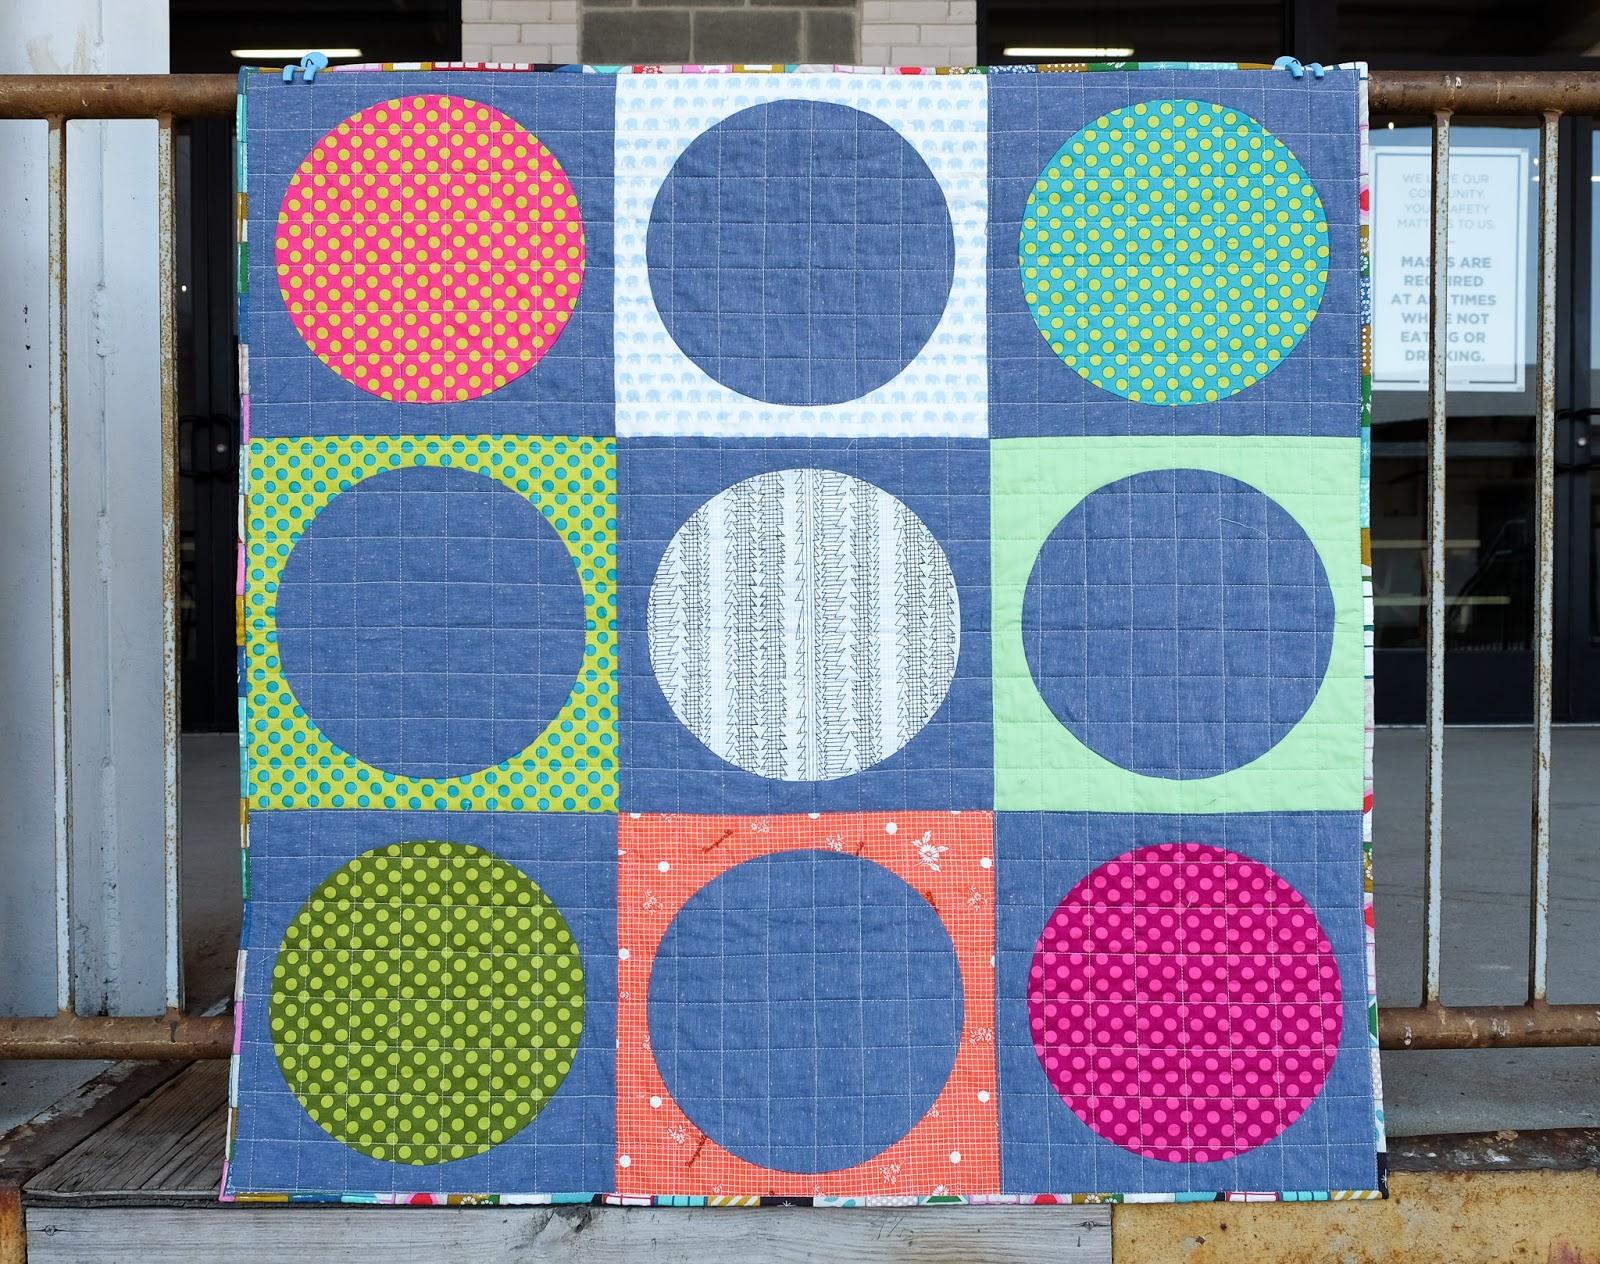
This month’s challenge is to practice machine-sewing curves by creating a quilt with nine full circles. This design is great for baby/toddler quilts because you can use large-scale prints and novelty fabrics for the circles.
Machine-sewing a full circle sounds daunting at first but just requires practice.
The methods that have worked best for me have come mostly from Latifah Saafir — her Clammy ruler instructions, a DCMQG workshop and QuiltCon classes.
I used the 12” Clammy ruler to make nine 15” blocks for a generously sized baby quilt (44”x44”).
What if you don’t have a 12” Clammy? There are tons of rulers and videos out there to achieve the same results. Find what works best for you. Some alternatives include:
Quilting Jet Girl’s free downloadable template for 8” circles
Modern Quilt Studio’s video on in-setting circles (using 12.5” circles and 11.5” holes)
Classic Curves Ruler - video for full circles with this ruler (Lynne has experience with this one if you have questions)
The 12” circles in this post are great to practice curves because they’re very forgiving.
Fabric selection:
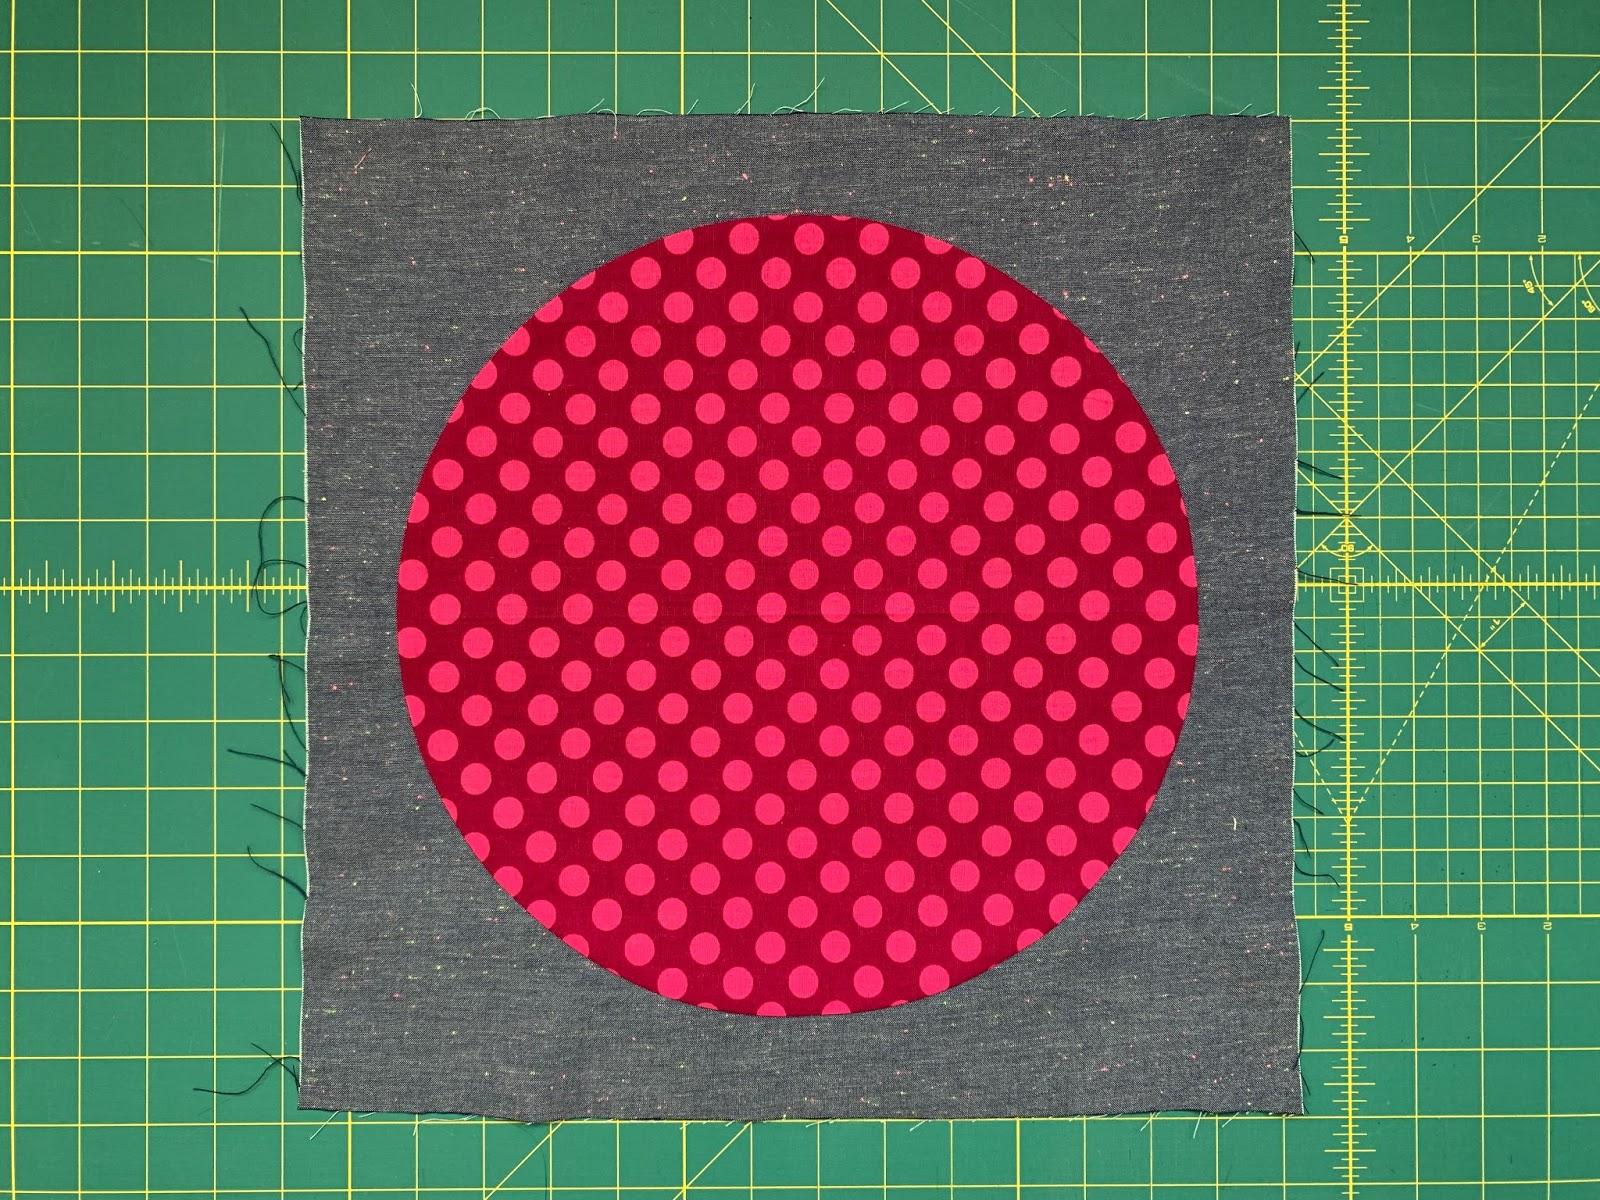
I used a common fabric for each block (Robert Kaufman neon neppy chambray). It will alternate between being the circle and the background. Then I picked nine other fabrics that will contrast well with it. I couldn’t resist these bright polka dots to stick with the circle theme.
You could also use the same background fabric for every block, with only the circles changing. Check out Jill’s colorful circles on an all-white background — like a Twister board.
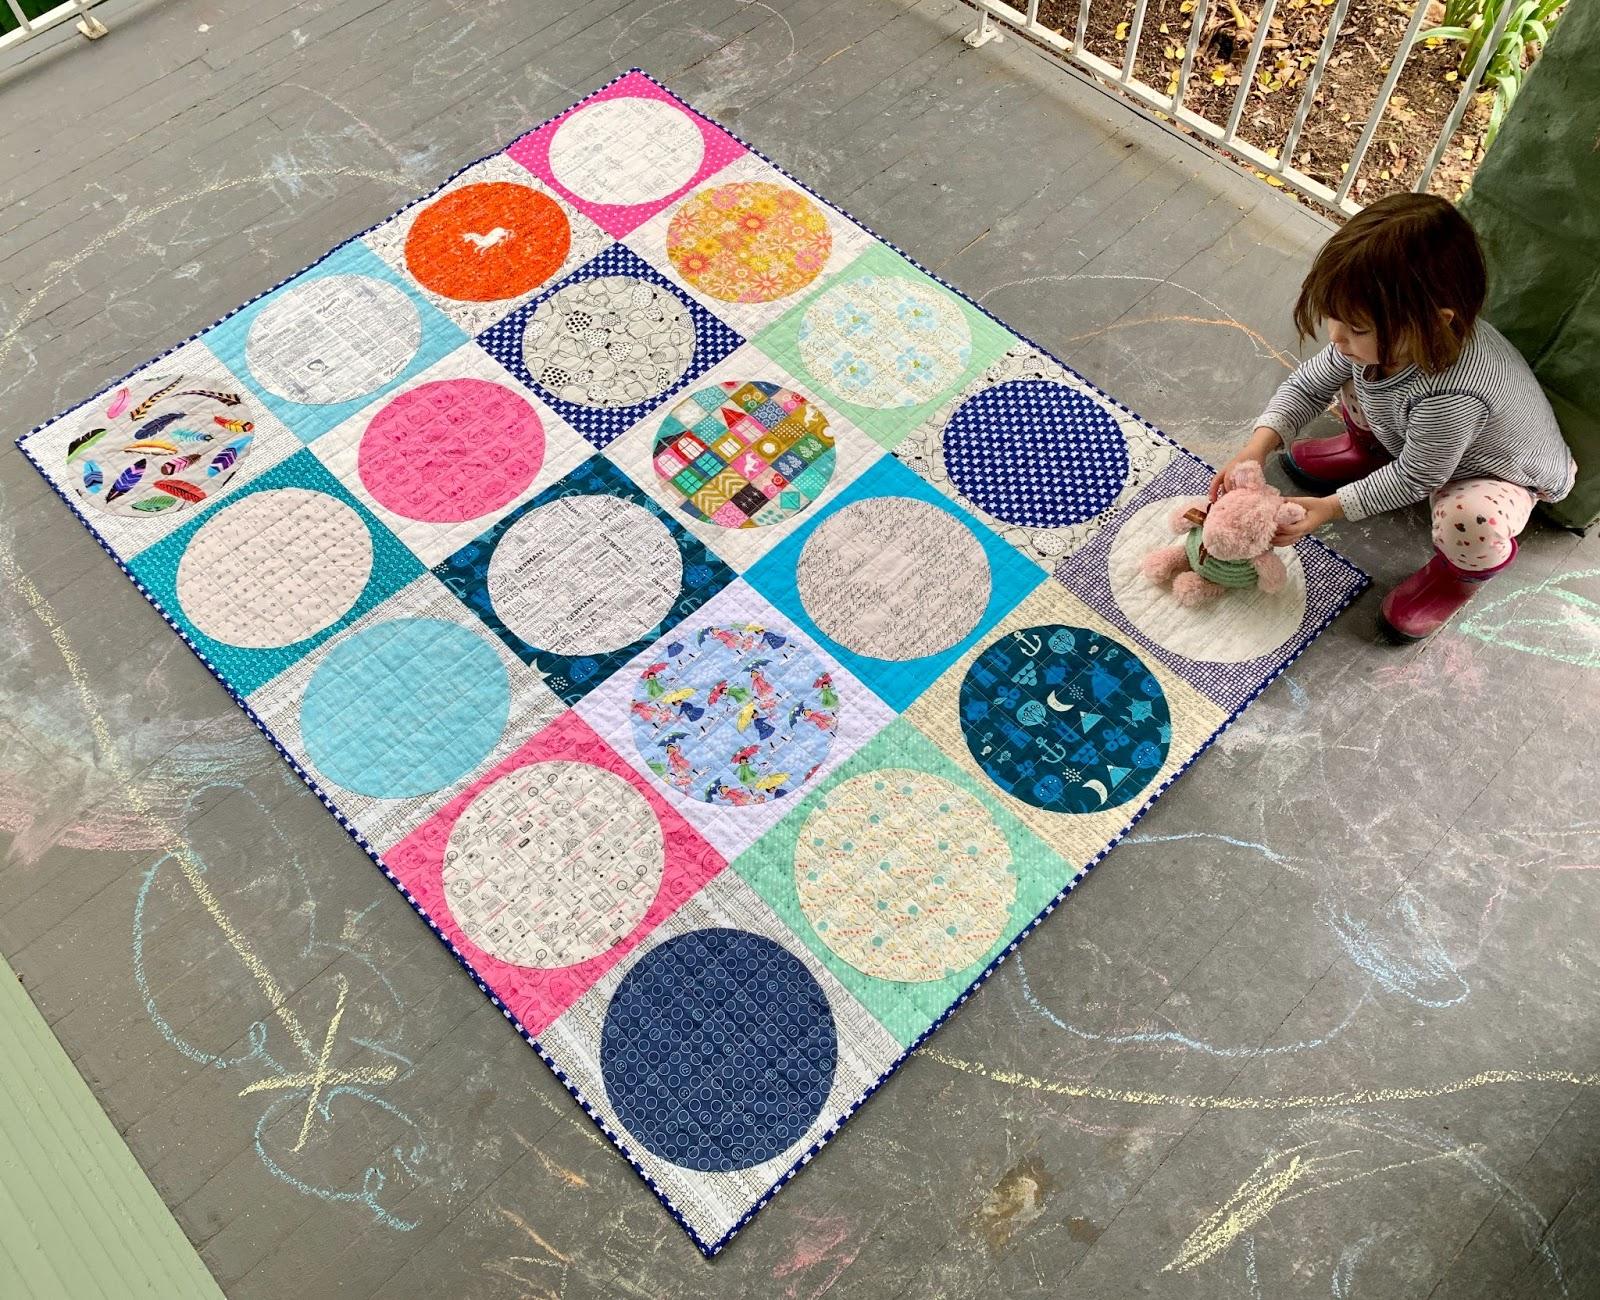
If you want to go scrappy and not use a common fabric throughout, just be sure your circles and backgrounds have a lot of contrast. One way to do that is to use low-volume fabrics that will alternate between being the background and circles. This quilt with 20 circles used low volumes as the contrasting fabric. And you can see how little people are drawn to these circles for games and imaginative play.
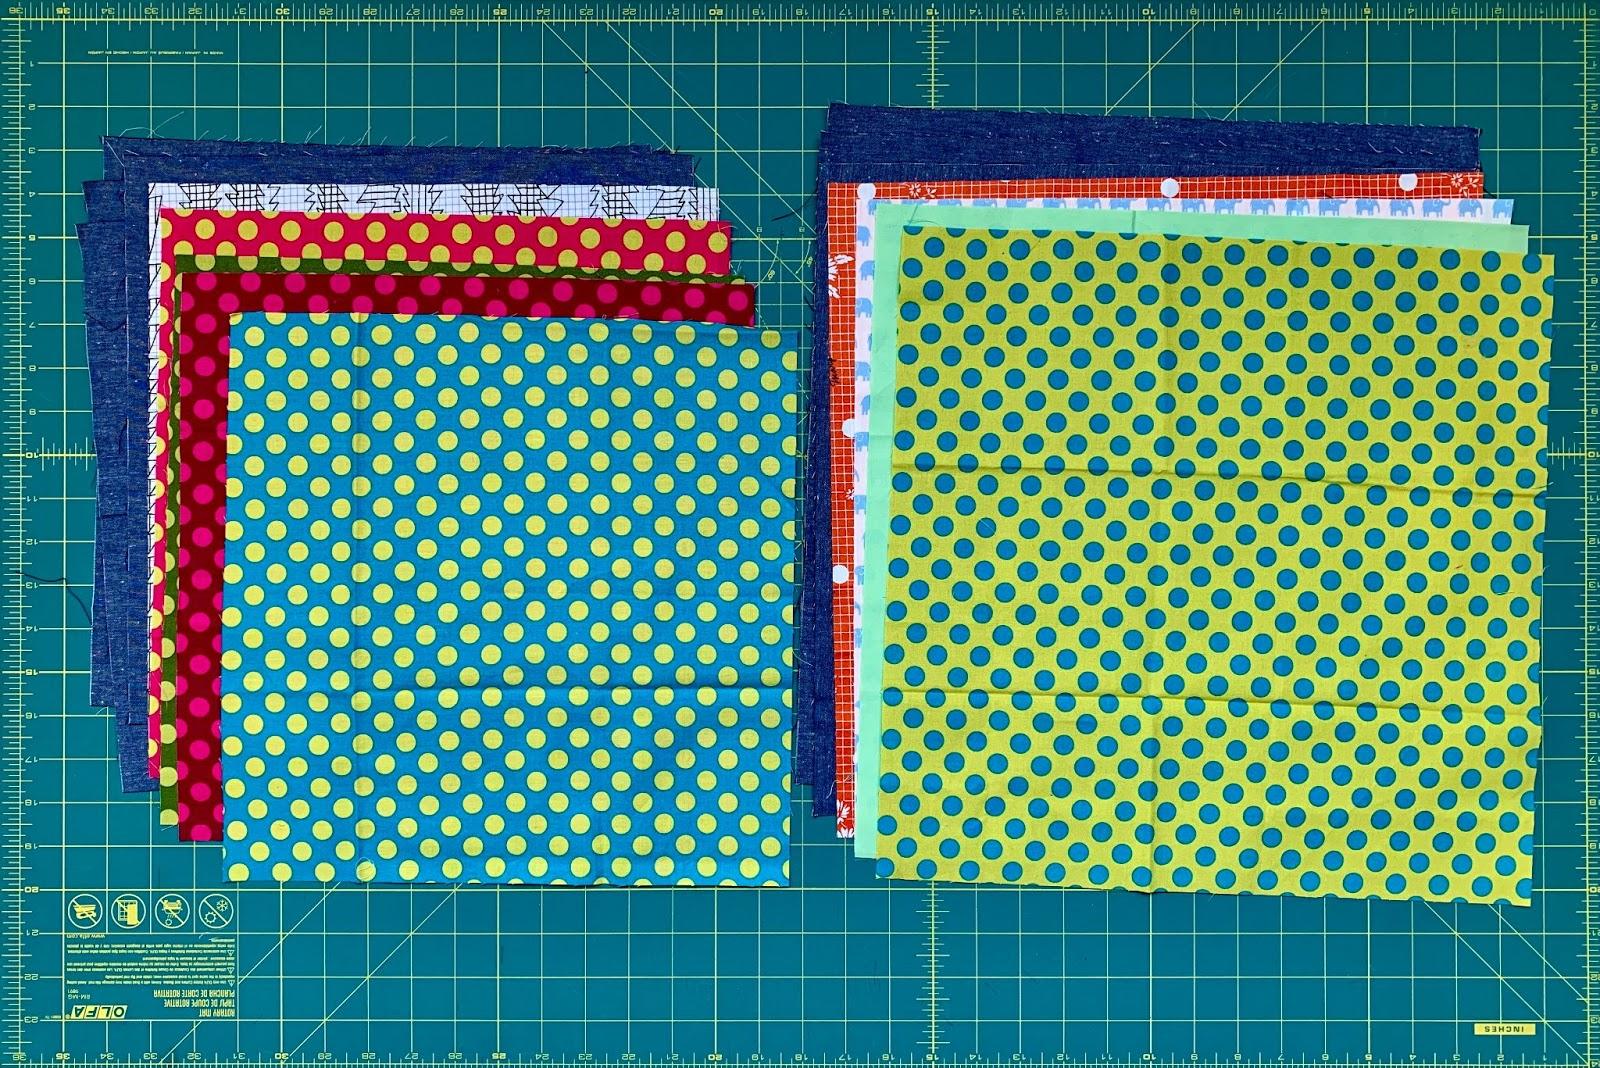
Pre Cutting:
Prints
5 - 13” squares (circles)
4 - 15” squares (backgrounds)
Chambray
4 - 13” squares (circles)
5 - 15” squares (backgrounds)
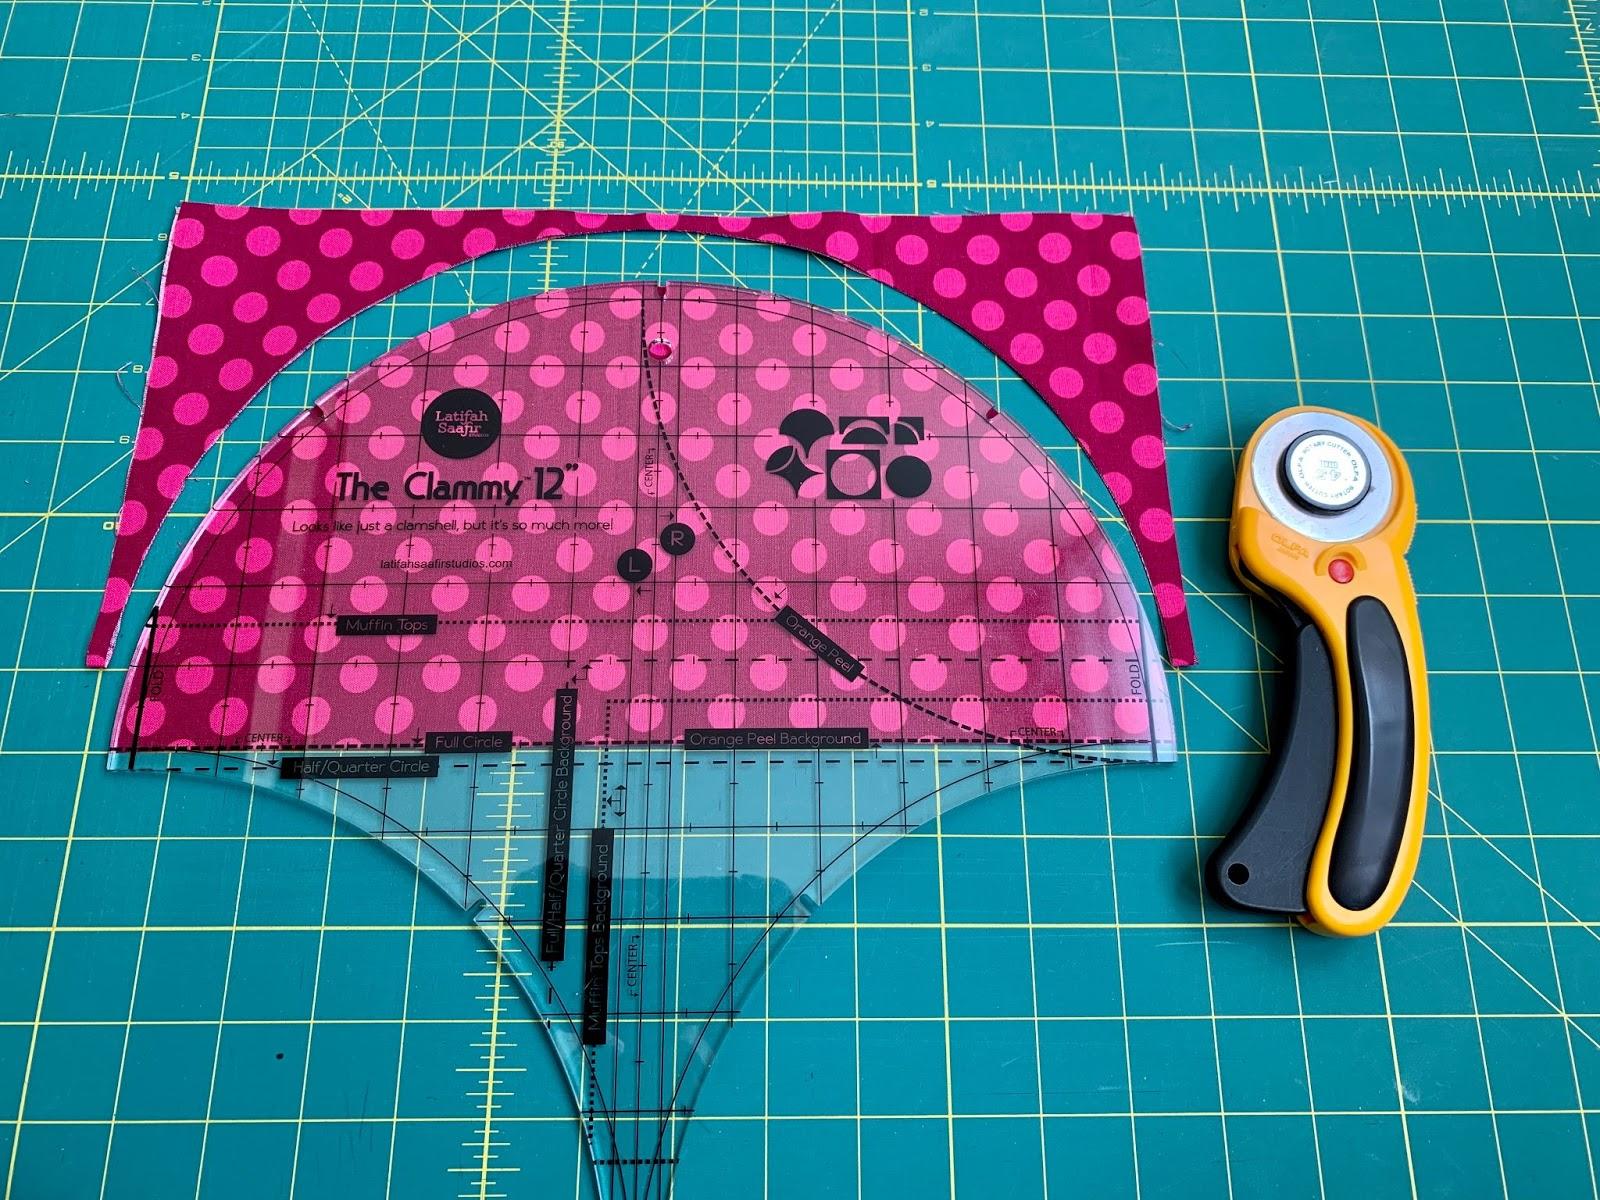
Clammy ruler cutting:
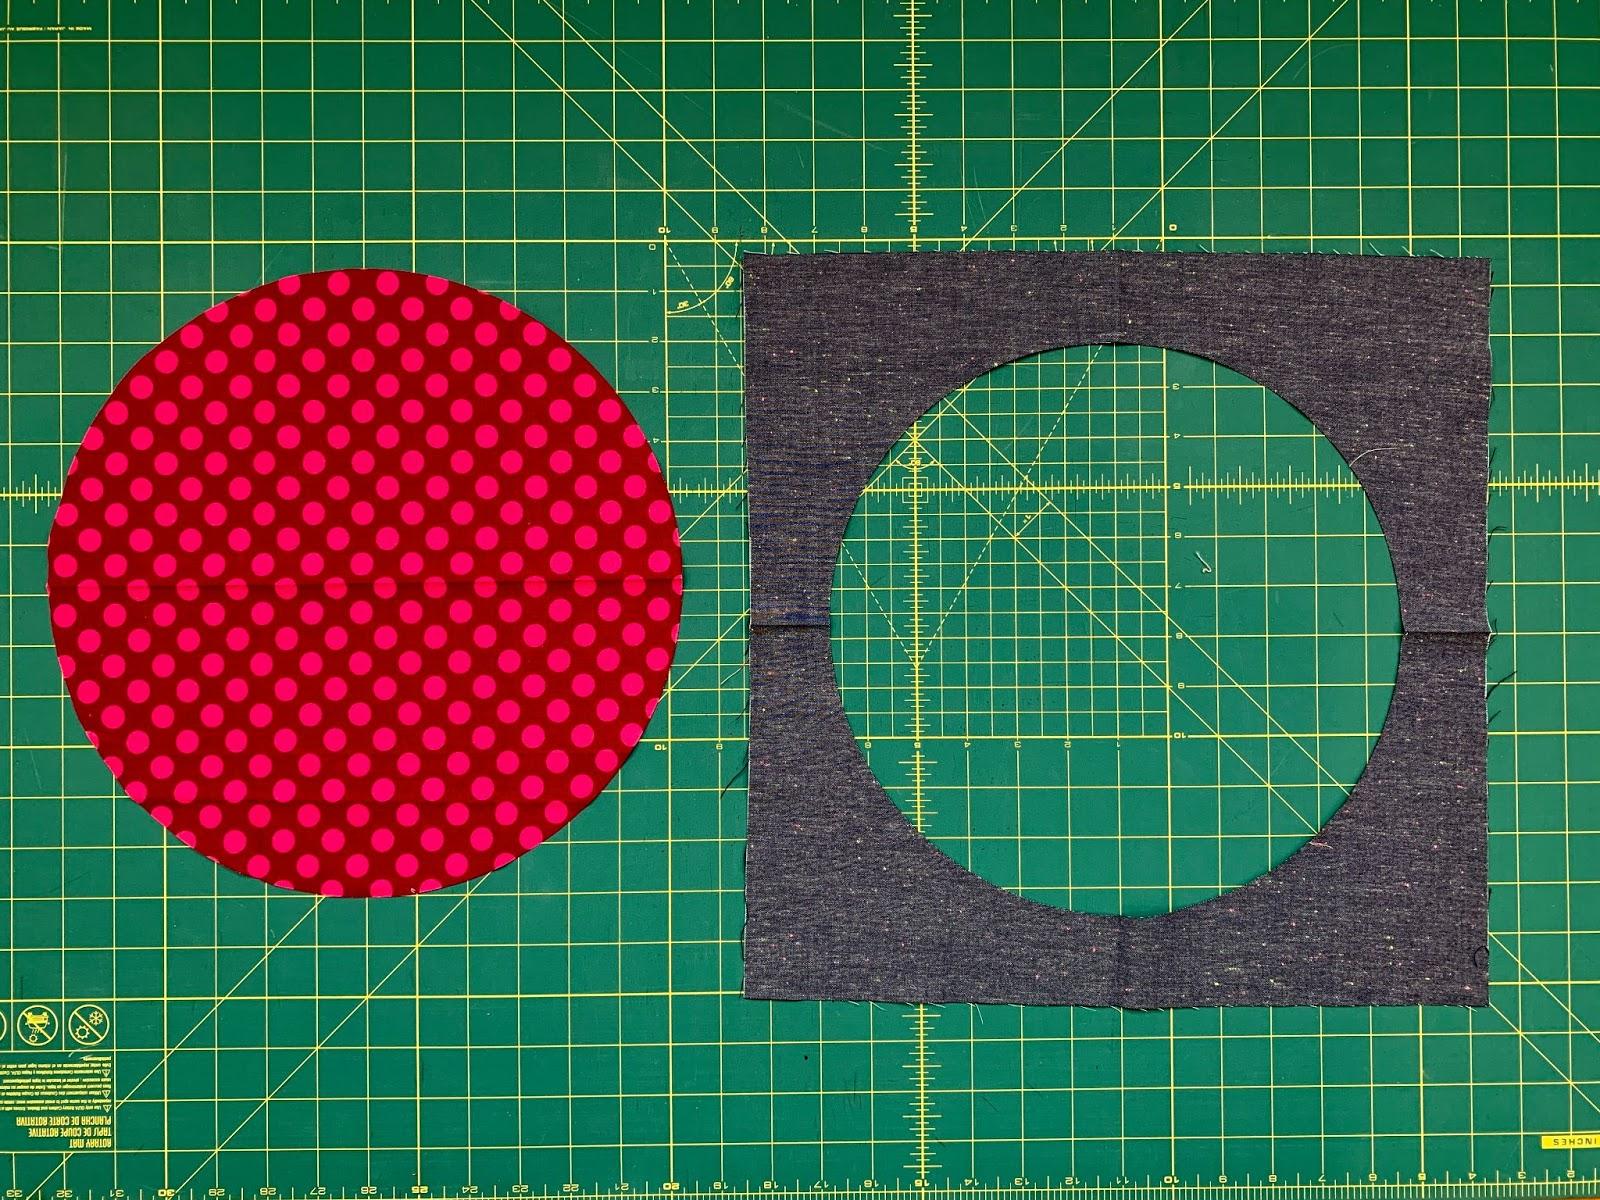
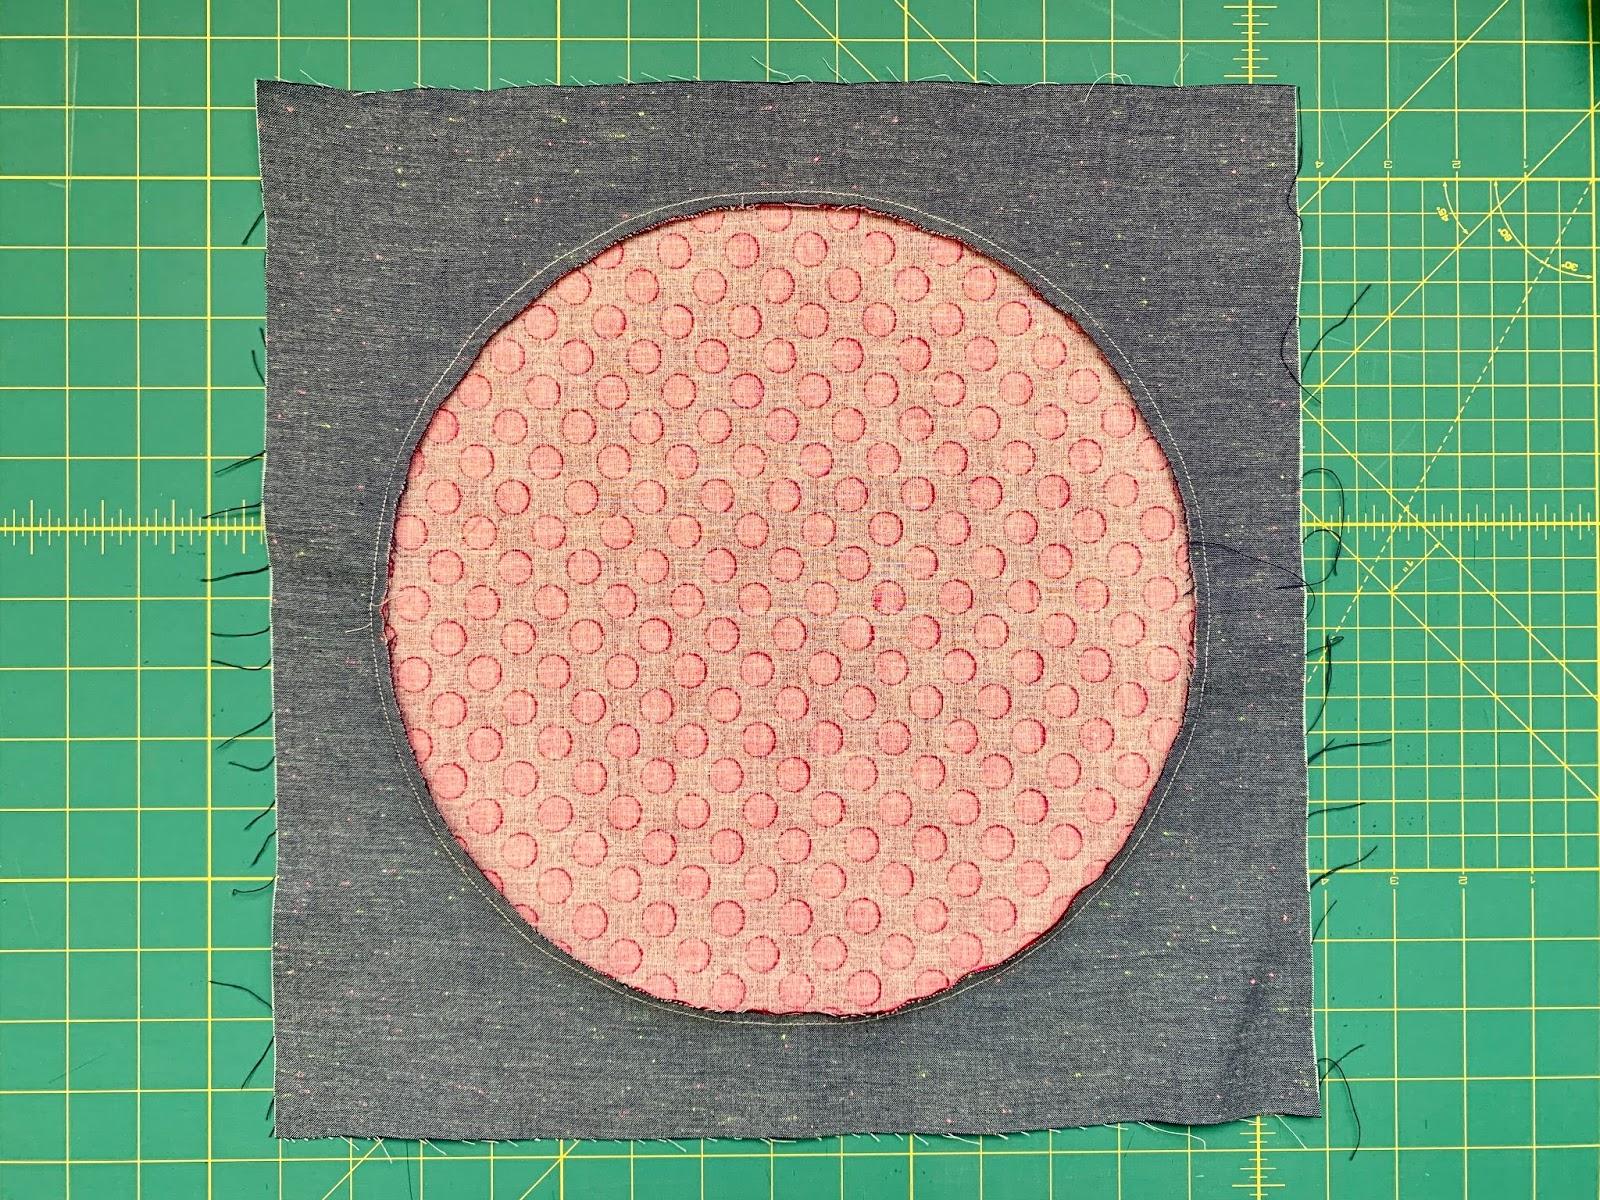
Circles: Fold and press each 13” square in half. Line up the Clammy as directed with the “full circle” line. Rotary cut.
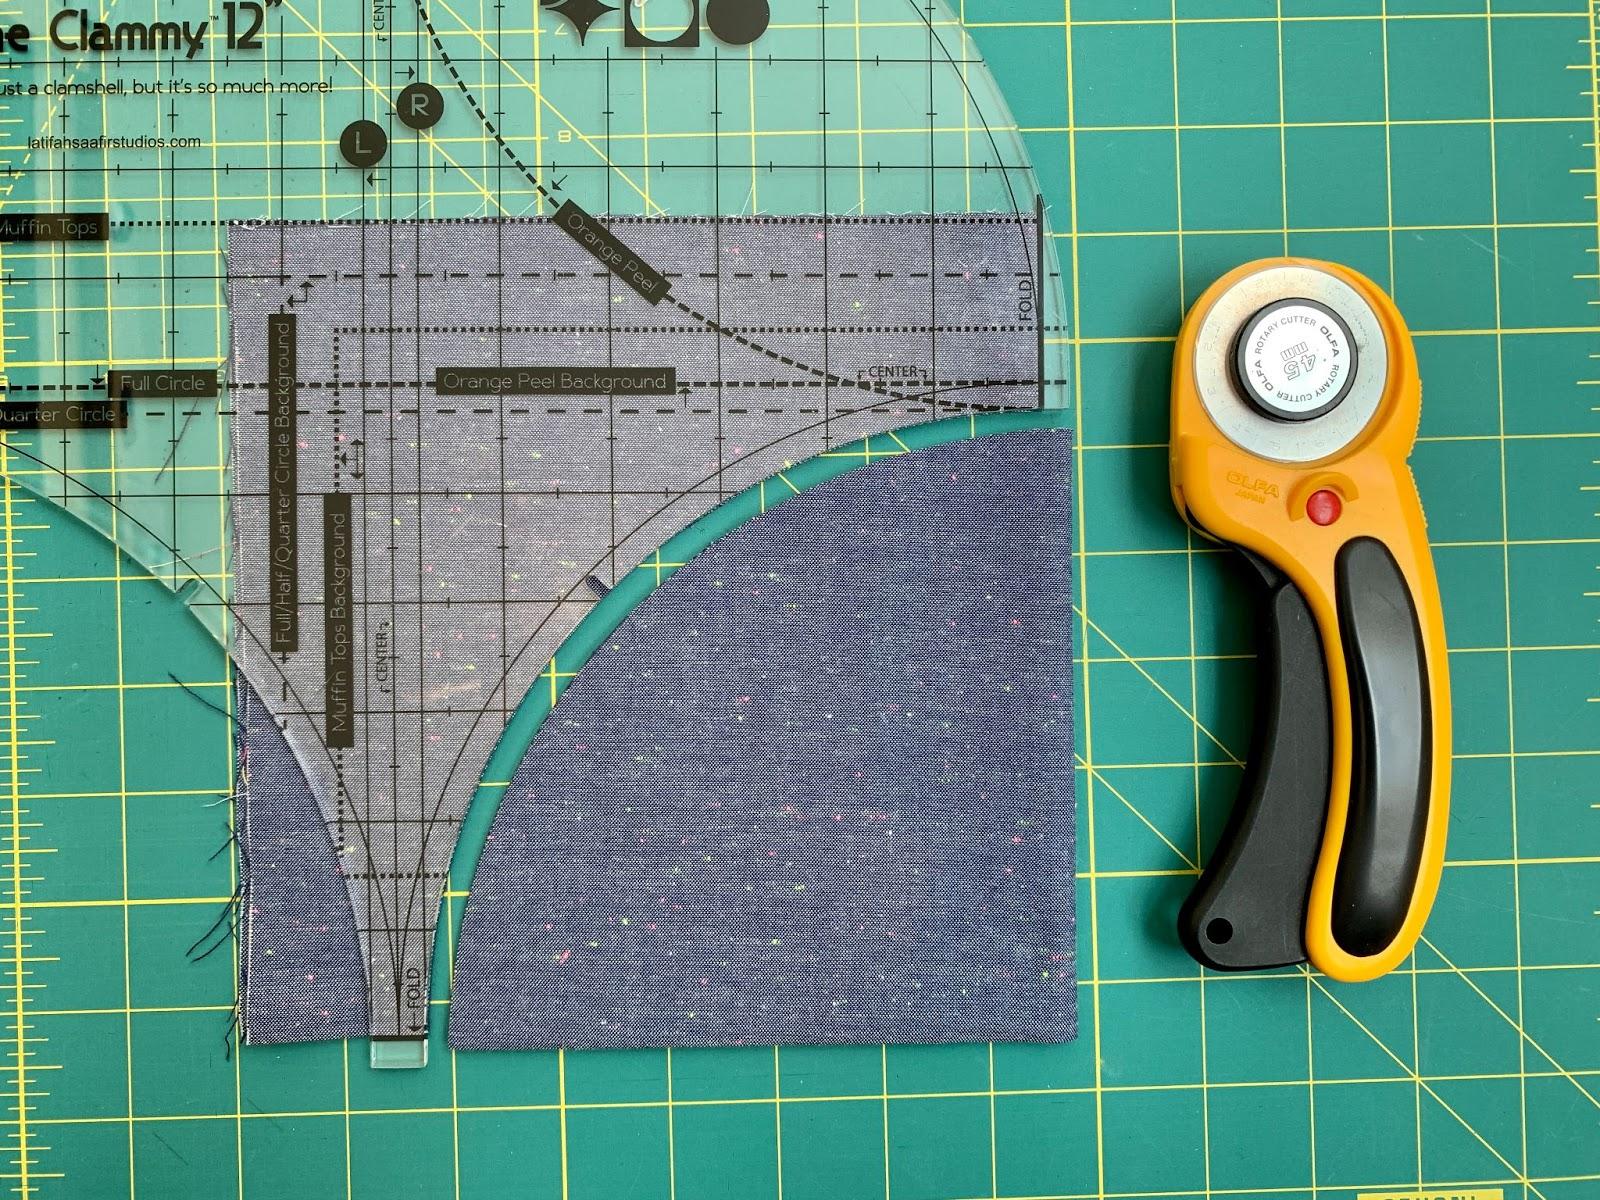
Backgrounds: Fold and press each 15” square into quarters. Line up the Clammy with the “fold” lines along the two folds of the fabric and one set of raw edges at the “muffin tops” guide. The raw edges will go past the “full/half/quarter background” line because the Clammy instructions call for a 14” background piece. I’ve expanded it to give you more wiggle room.
The ruler comes with a cardboard guide with directions for all the shapes. Also be sure to check Latifah Saafir’s YouTube channel for tons of helpful videos.
Pressing registration marks:
Fold the circles and backgrounds into quarters — press well at the edges to mark where the two pieces will meet every 90 degrees. Press one more set of guides by folding each quarter in half so you’ll have a registration mark every 45 degrees. You’ll use these guides as you’re sewing.

Piecing circles:
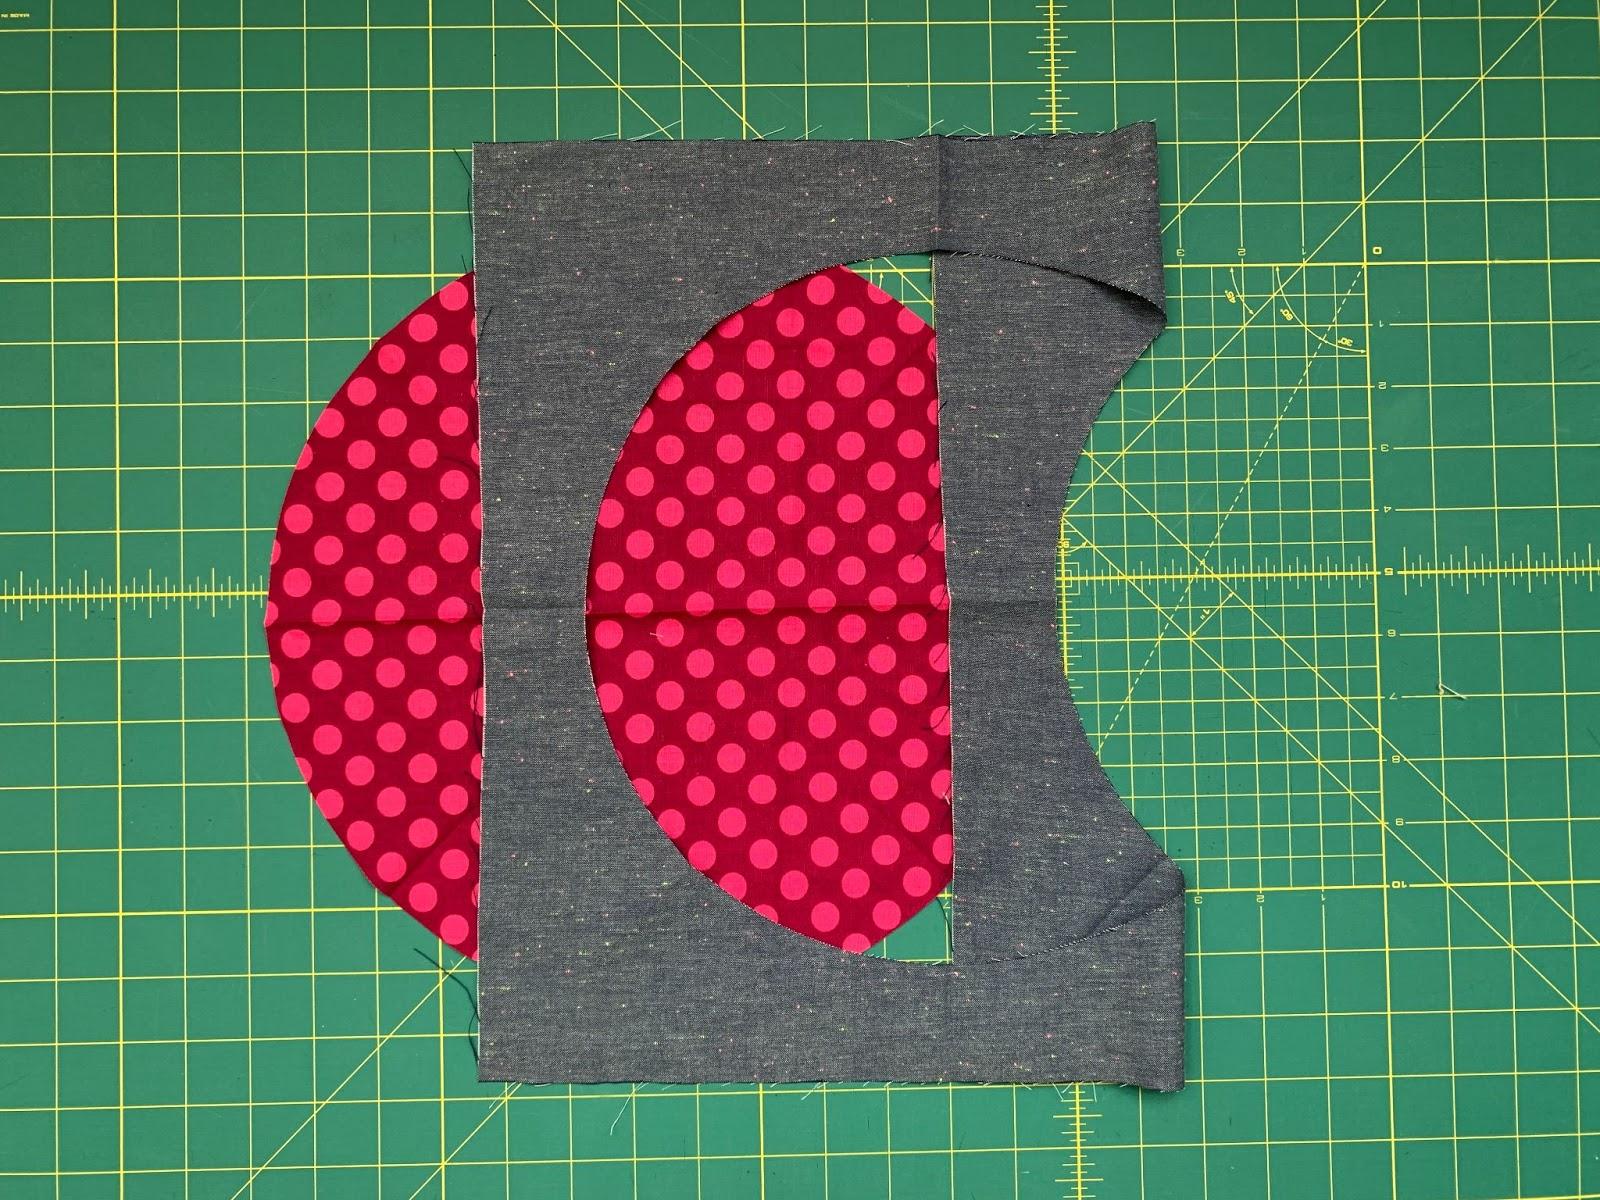
Start with a circle face up on your sewing surface. Place one background ring on top of it, right sides together. Shift the ring to the right side of the circle, lining up the curved edges. Carefully fold back the rest of the ring so it’s outside the sewing machine next. This part doesn’t look right at first.
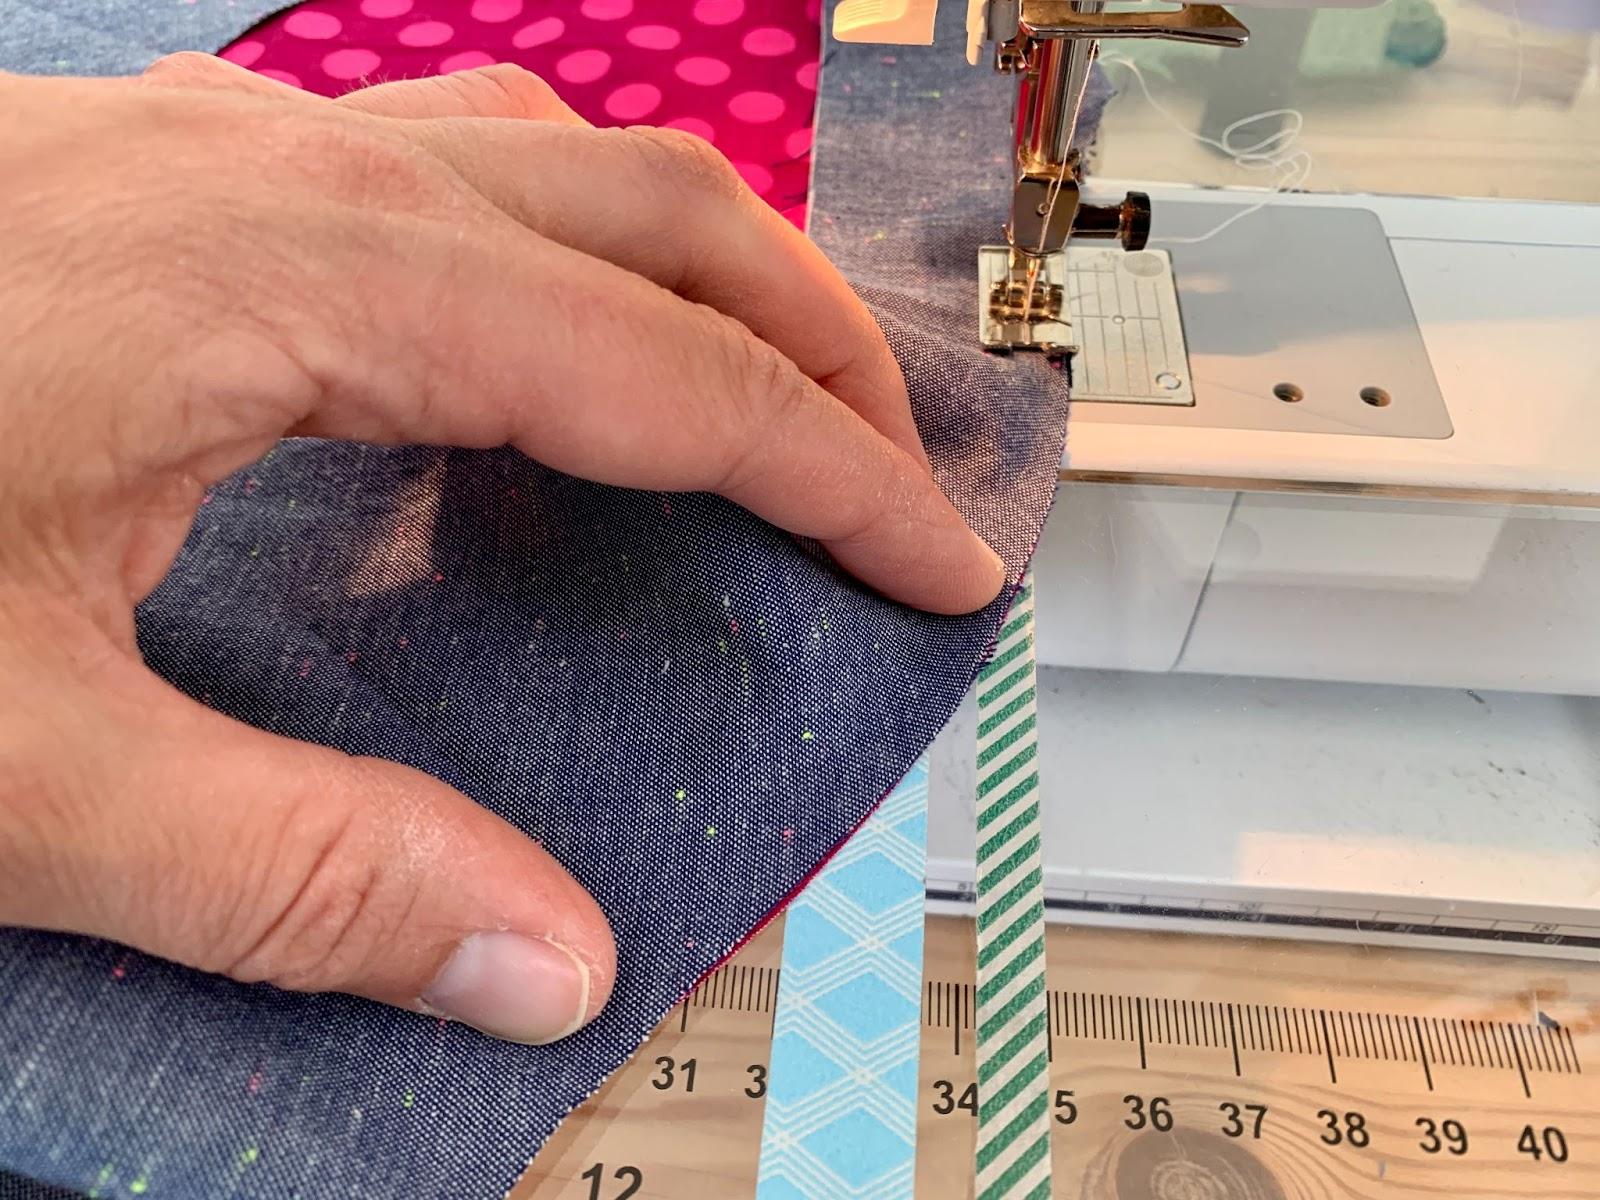
Sew a few stitches. Stop and find the first set of registration marks. Line them up with your hand (or a pin if you prefer), then ease the ring onto the circle. You’ll stretch it slightly to fit. Sew to the next crease. This is one-eighth of the circle, or 45 degrees. Stop and repeat the process of lining up the registration marks, stretching the ring onto the circle and sewing that section. Repeat until you get all the way around.
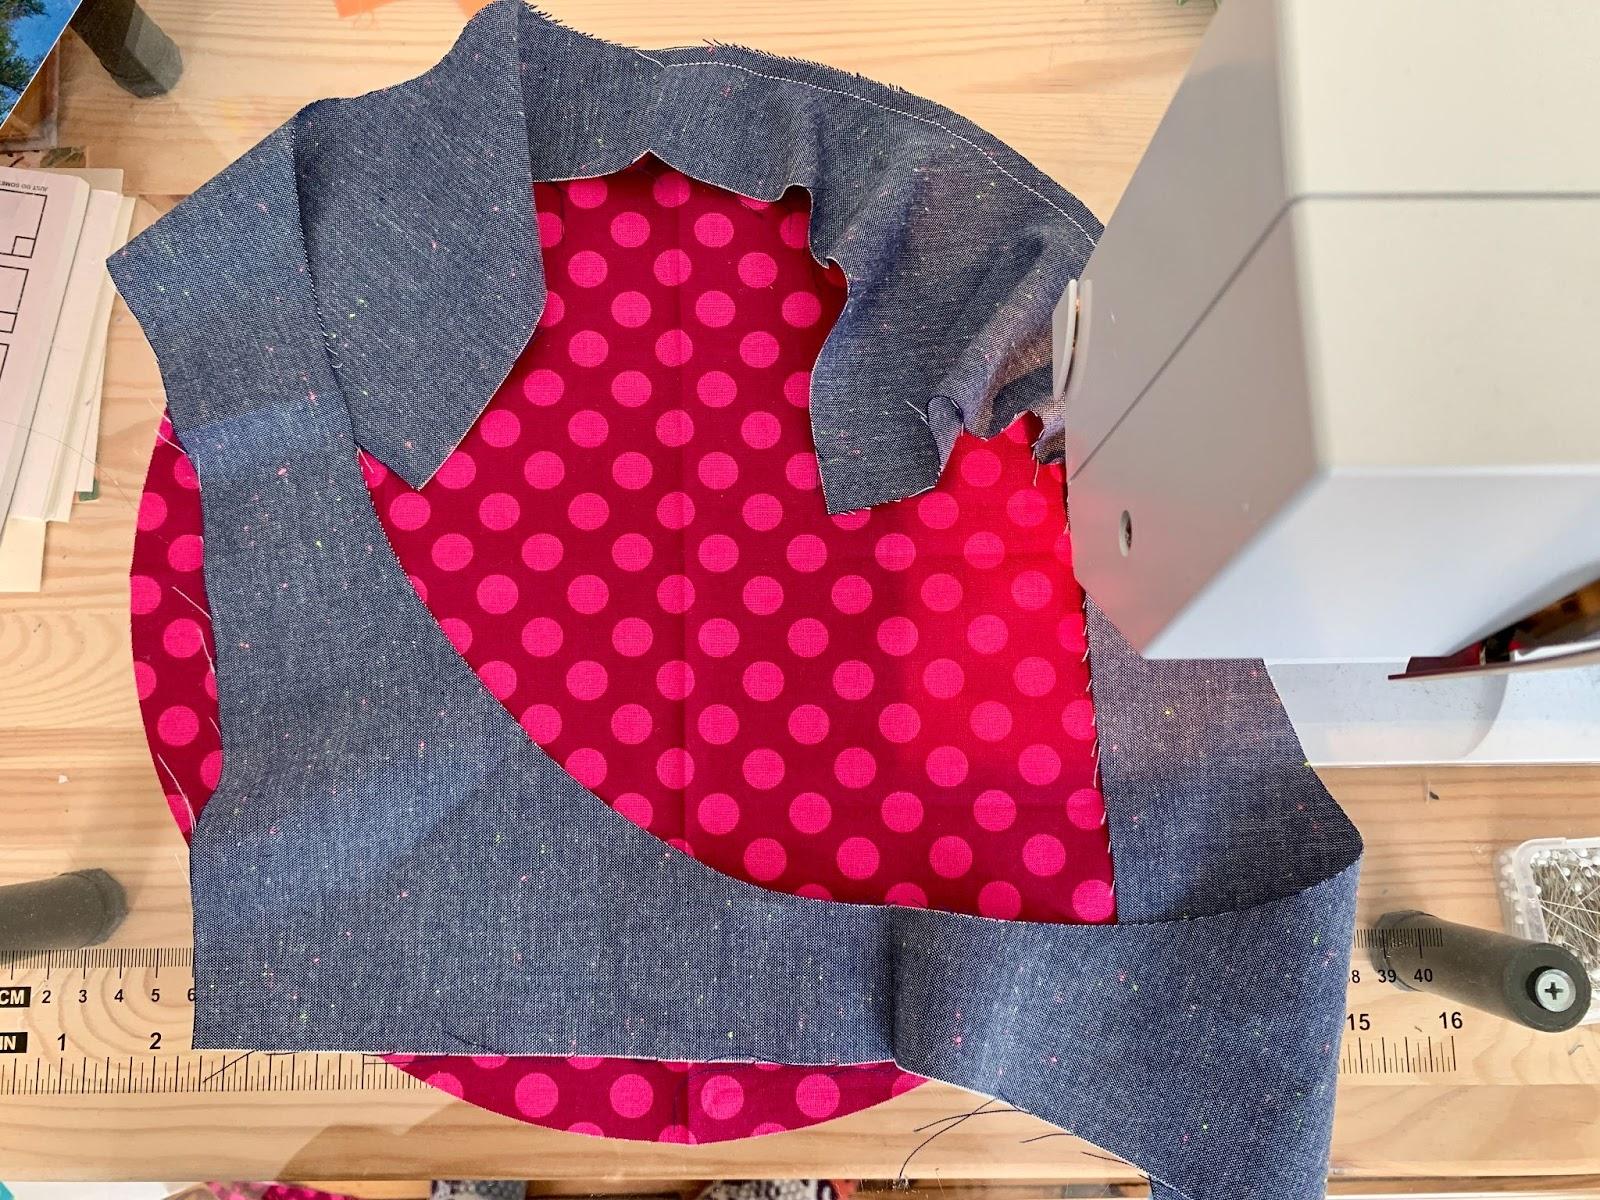
This takes practice, so the first few circles could be wonky but it gets easier! Keep practicing.
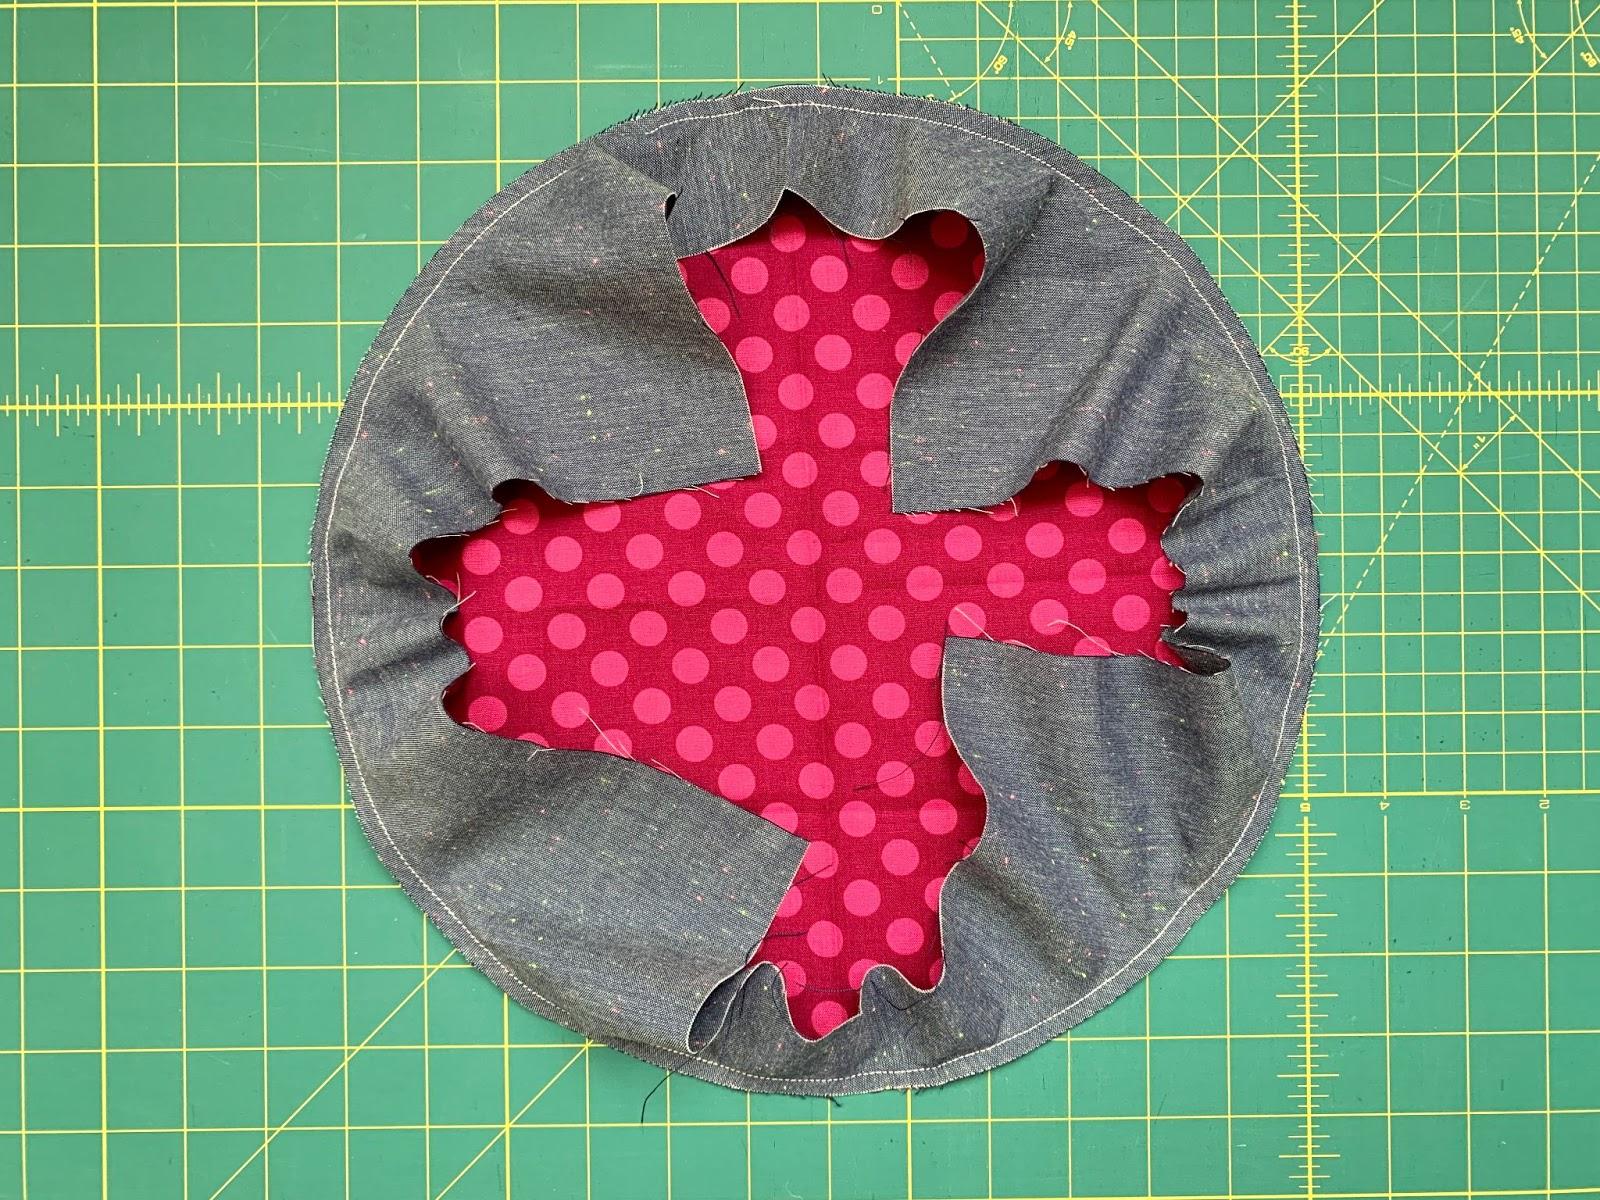
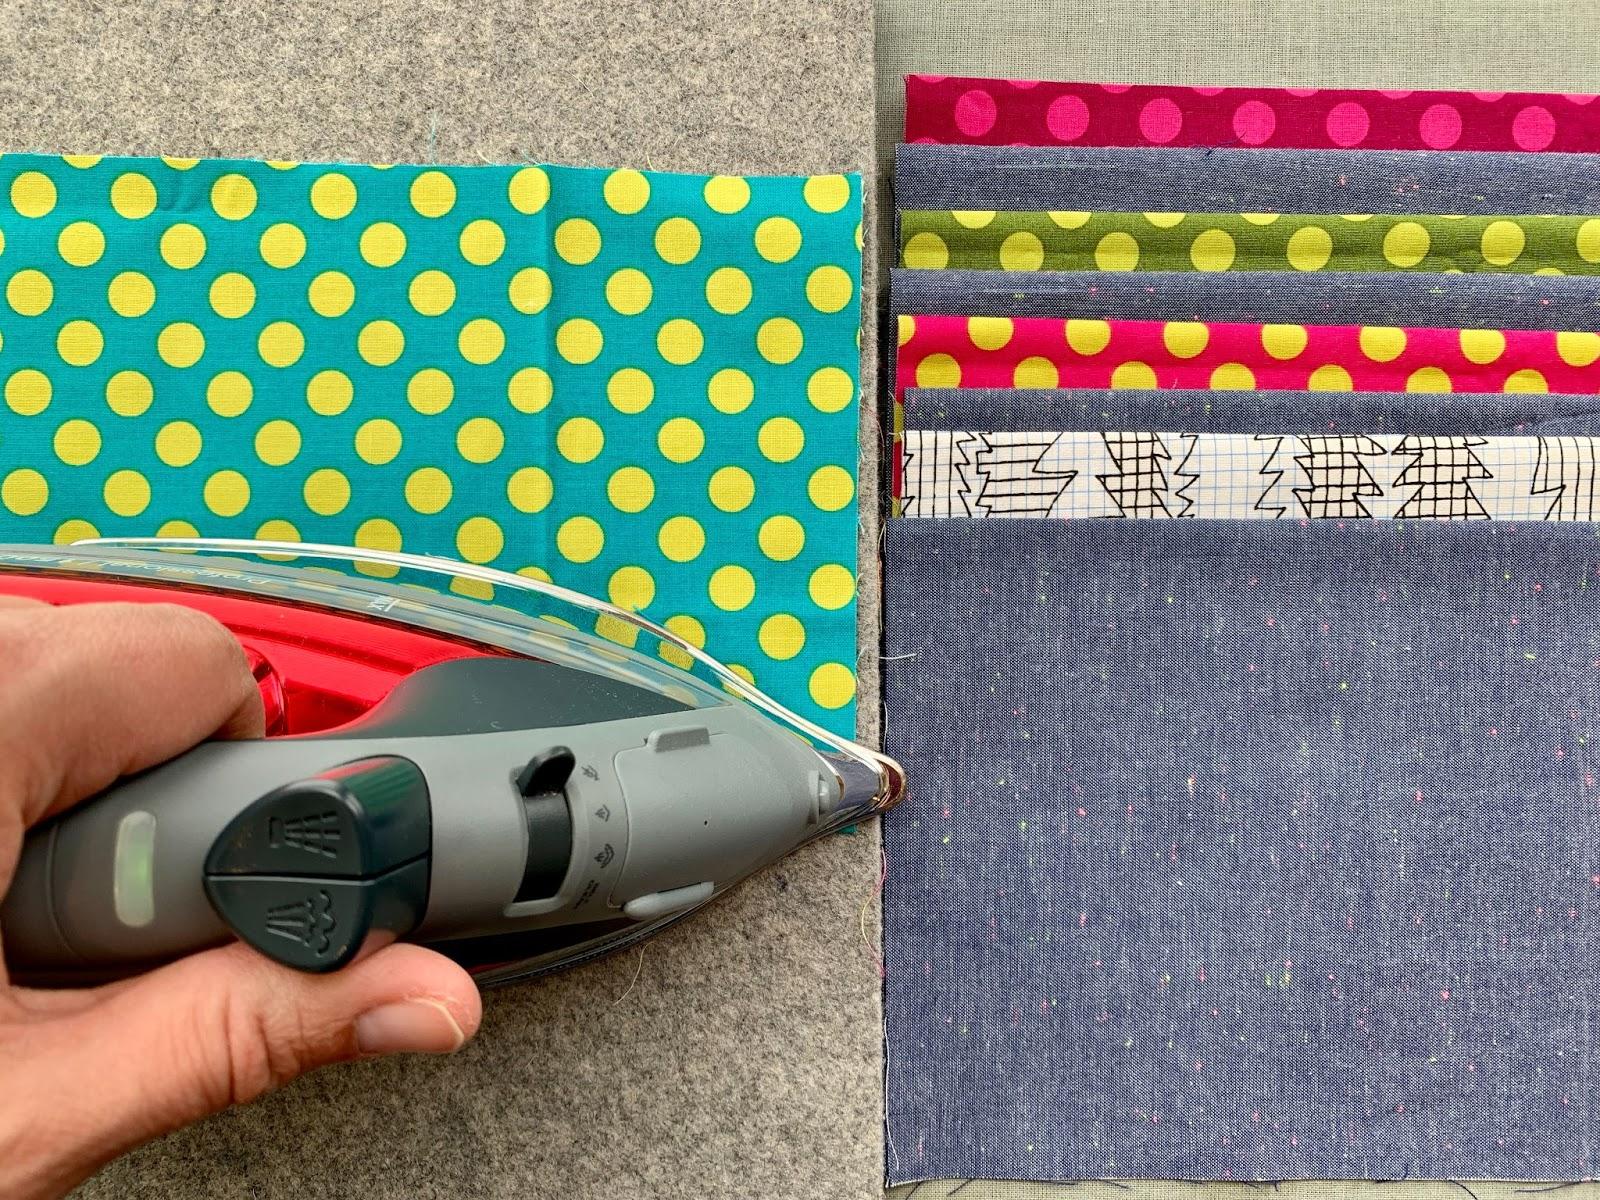
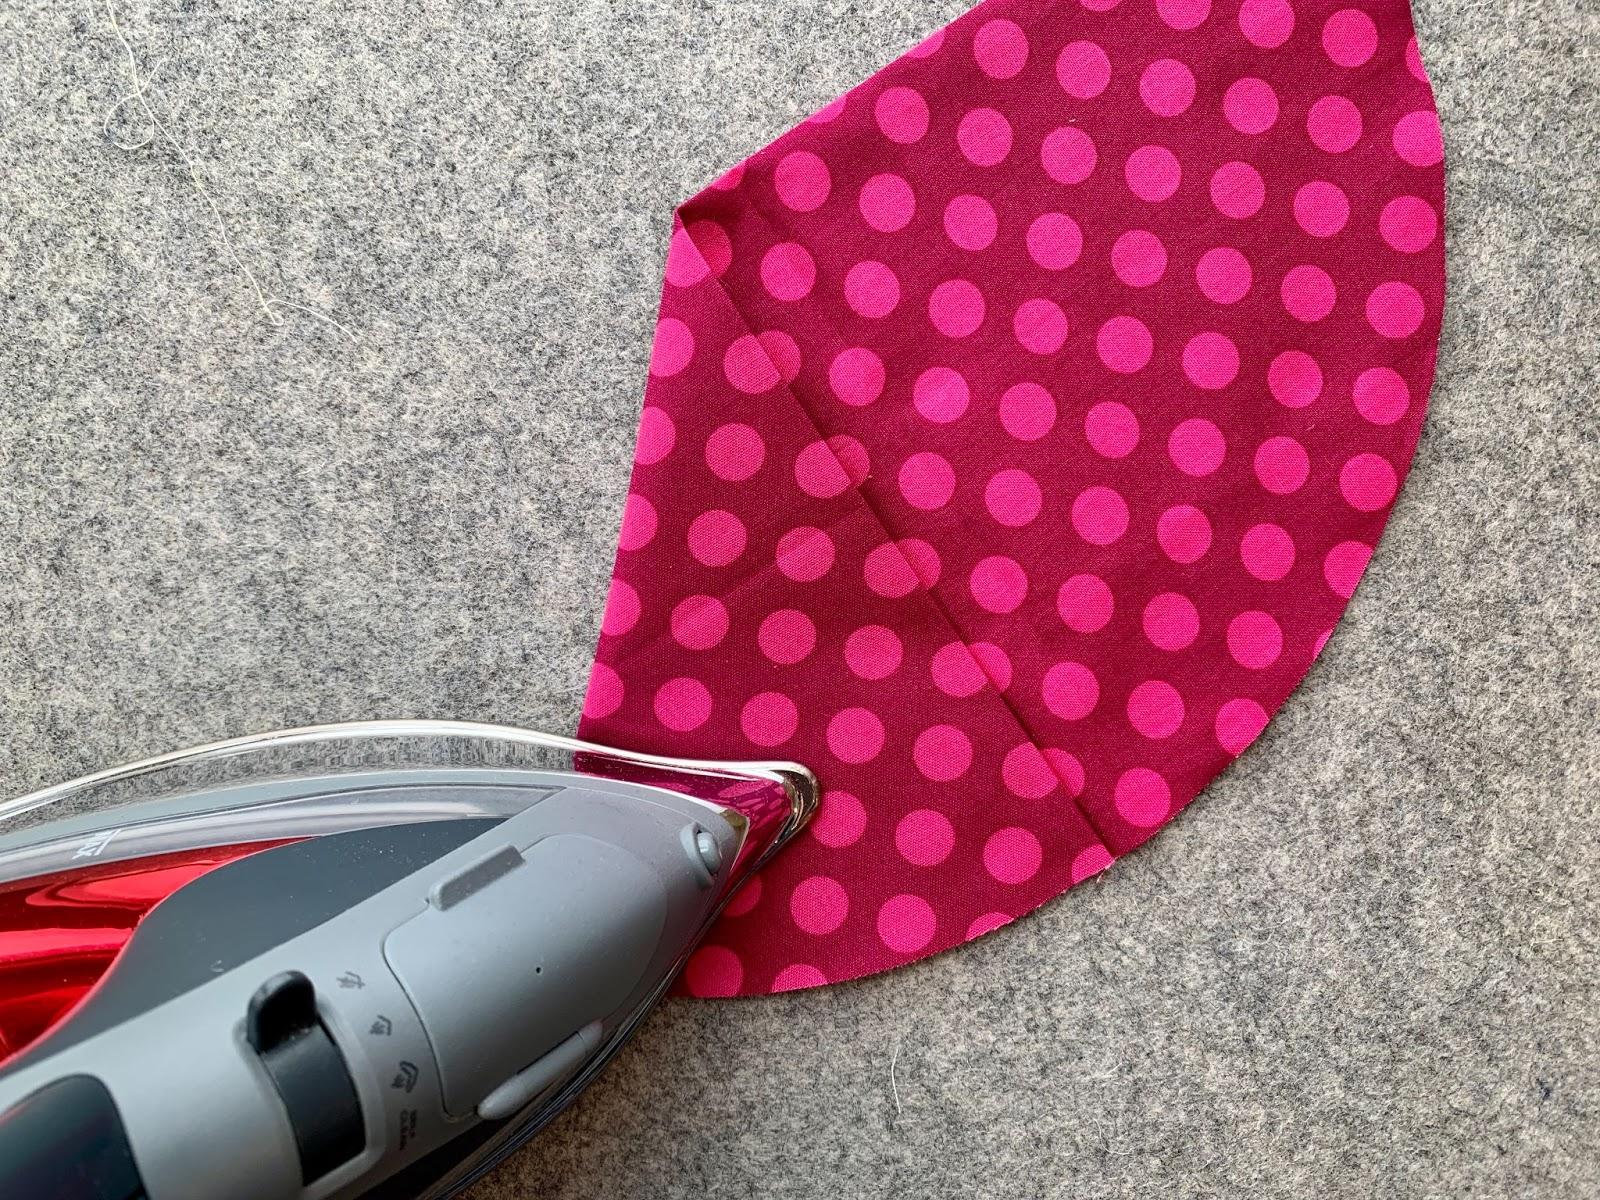
Pressing blocks:
Press the seams toward the circle. This seemed counterintuitive to me, but it does lay well and will make the circles pop a bit in the finished quilt.
Piecing top, finishing quilt:
After pressing, check how square your blocks turned out. If you’re just learning curves, they could be a bit off. That’s not a problem — just square up all your blocks to 14.5” or 14.75”.
Lay out your blocks, alternating between print circles and background circles. The prints will be the corner and middle squares.
Piece the squares like a nine patch
Baste, quilt and bind!
Please get in touch if you have any questions. Hope you have fun with these circles!
